Select jaw with upper or lower button in Final Position window.

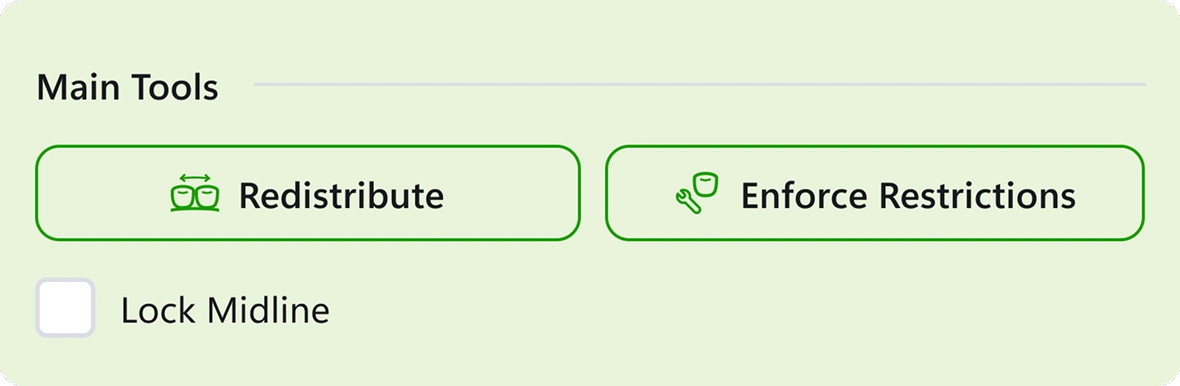
In the Main Tools section, use Redistribute to evenly distribute the interproximal contacts.
Use the Enforce Restrictions button to keep movements within the set parameters.
Enable or disable the Lock Midline checkbox to maintain the initial position of the midline.
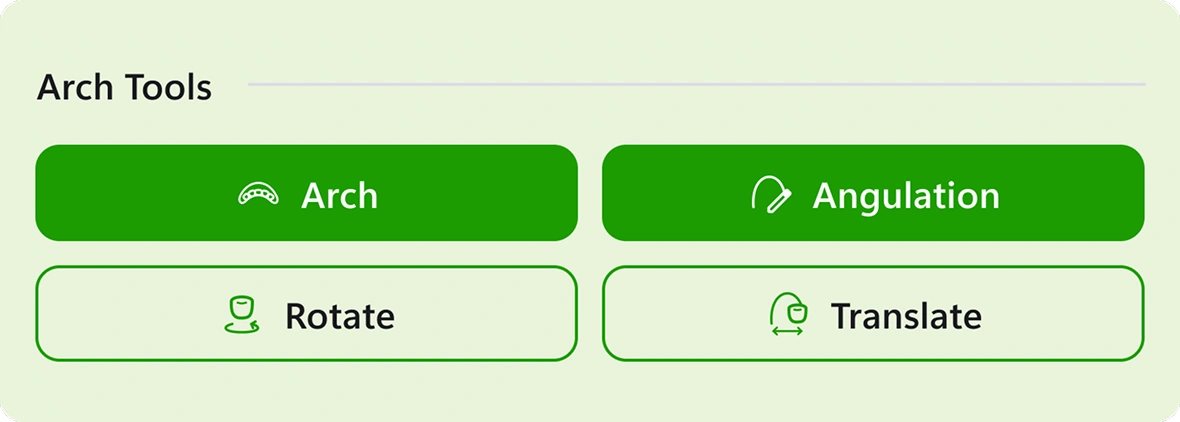
In the Arch Tools section, press the Arch button to activate the Angulation, Rotate, and Translate options.
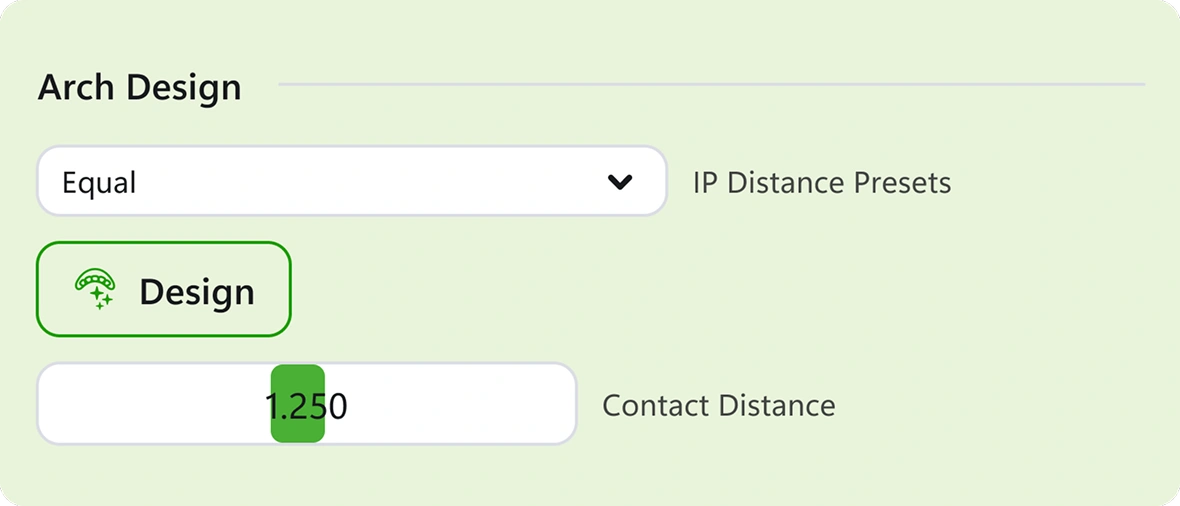
In the Arch Design section, select the IP Distance Presets and apply them using the Design button.
With the Contact Distance option, choose the desired IP contacts value; this only works with the Equal preset.
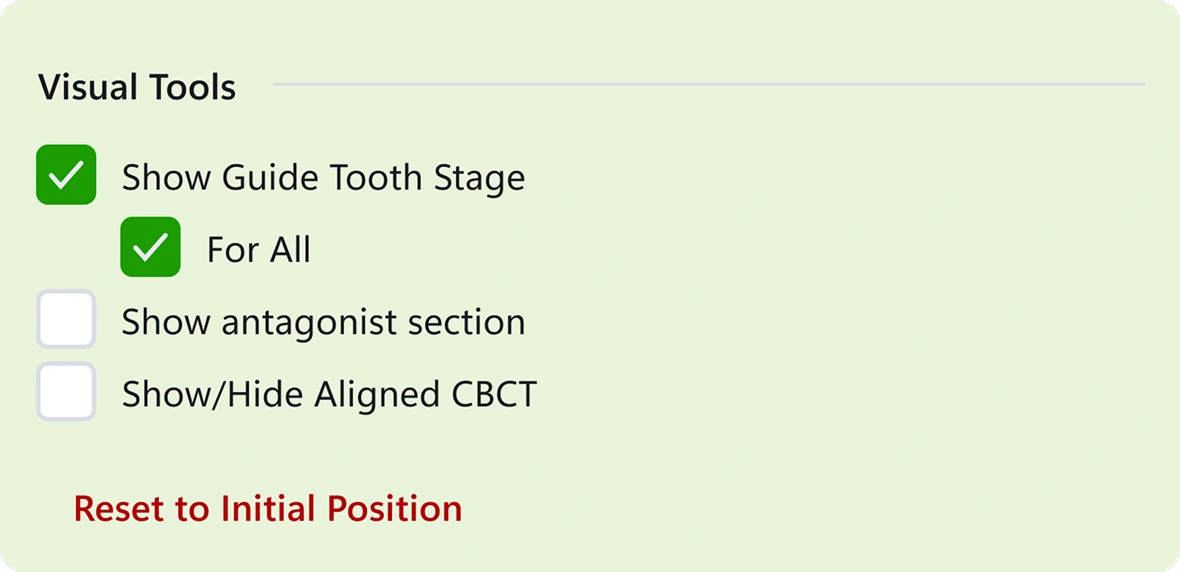
In the Visual Tools section, enable the Show Guide Tooth Stage checkbox to display the maximum number of stages per tooth, and enable Show All to view them for all teeth.
The Show/Hide Aligned CBCT checkbox allows you to view the CBCT files aligned with the model.
Reset to Initial Position returns all teeth to their initial position.
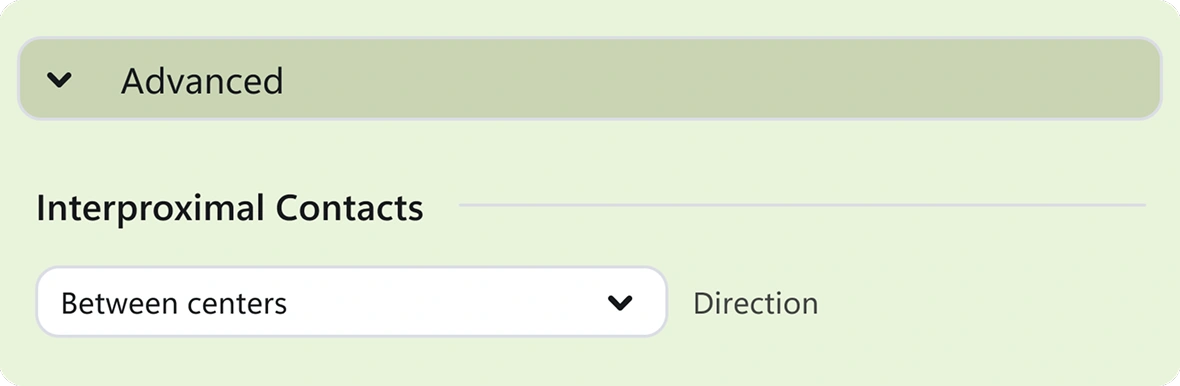
In the Advanced section, select the Direction of the Interproximal Contacts.
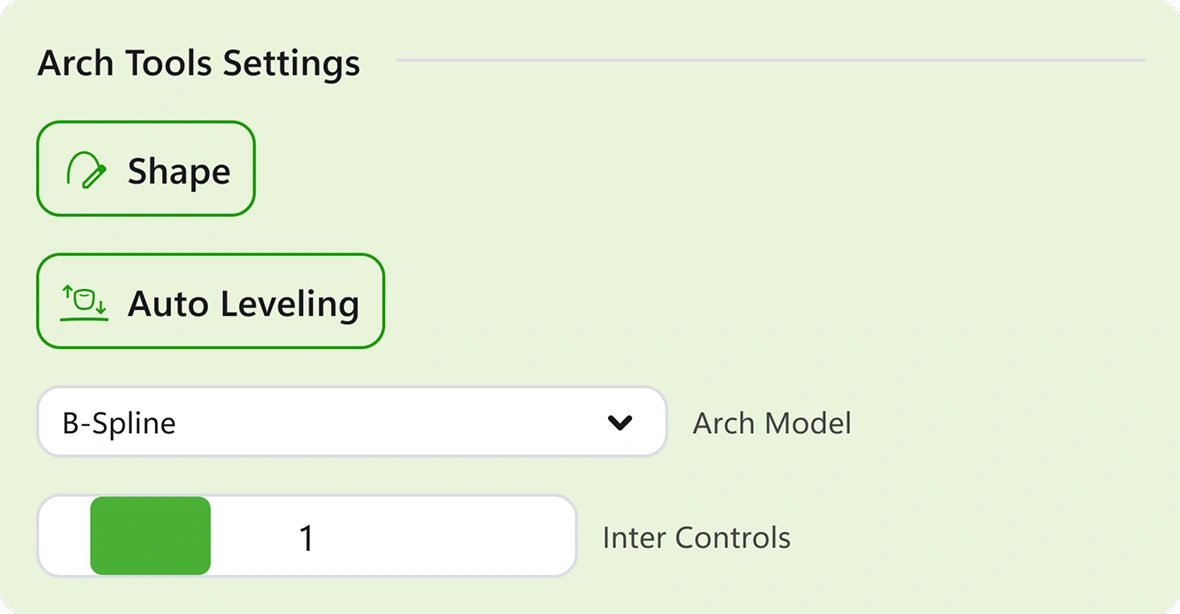
In the Arch Tool Settings, enable Arch in the Arch Tools section, which will allow you to use the Shape button to generate a selectable arch shape in the Arch Model field.
Autolabeling generates automatic leveling of the anterior teeth.
To enable the Inter Controls option, select the Bezier3 arch model, which will allow you to adjust the spacing in the arch.
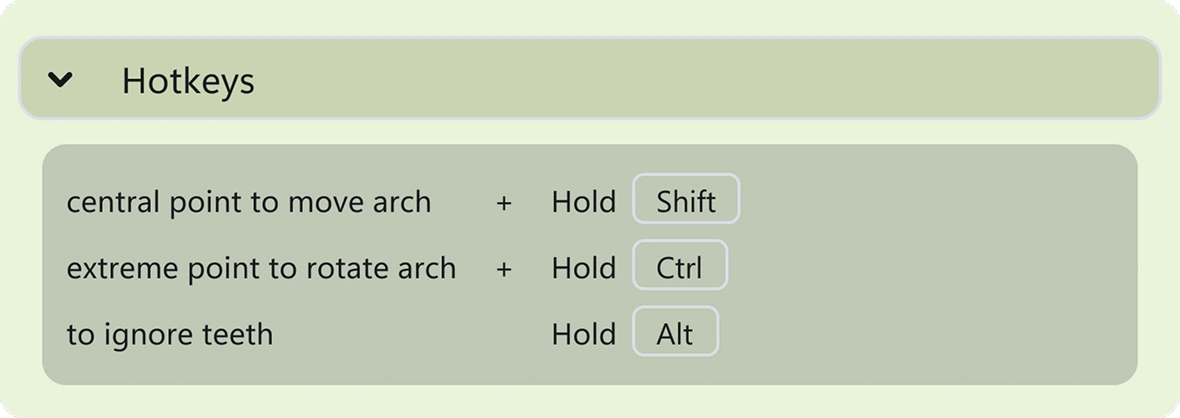
Find the hotkeys to move the model in the Hotkeys section.
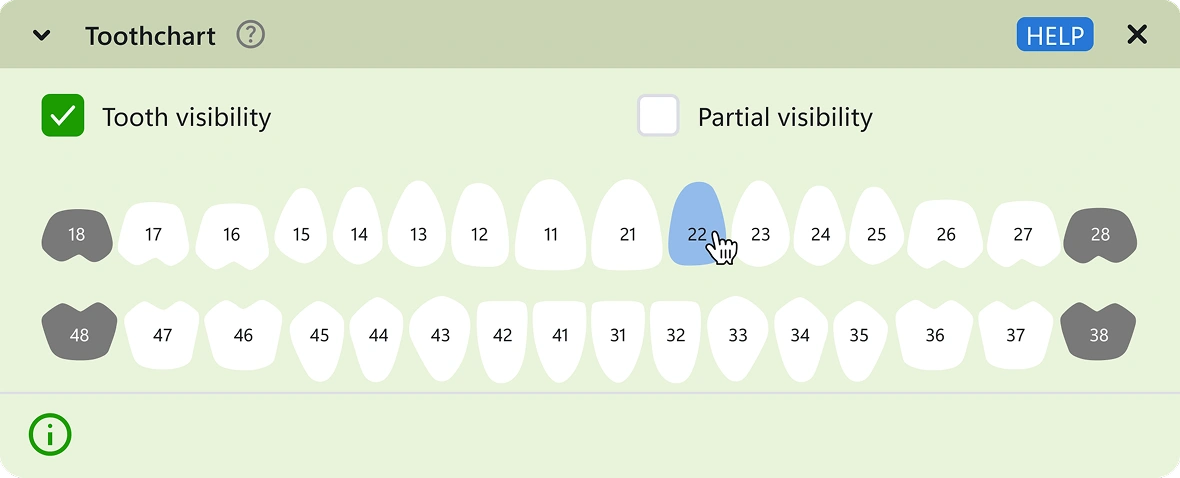
In the Toothchart section, there are the following options: Extracted to remove a tooth, Exist to restore the extracted tooth, Locked to return the tooth to its initial position and lock it, and LockedFinPos to lock the tooth in its current position.
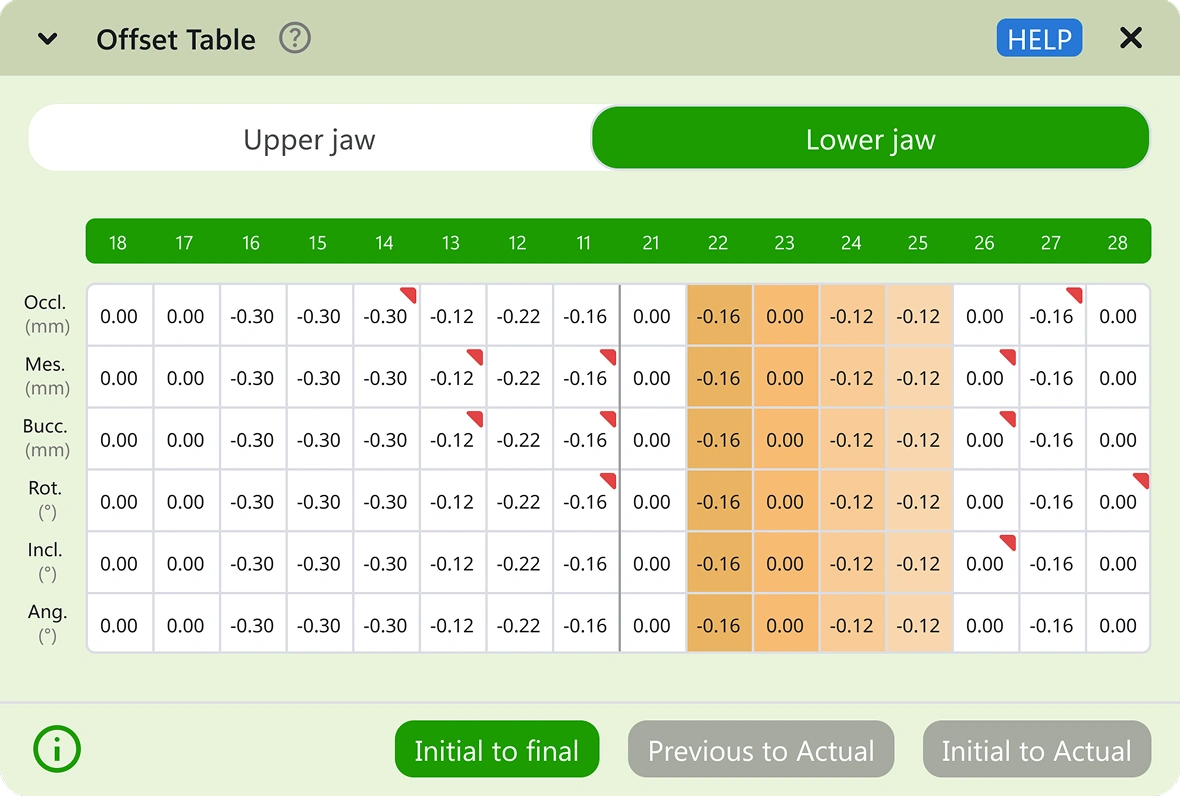
With the Offset Table, you can check the parameters of the movements made in Final Position. Movements that are out of range will be marked with a red bullet.
At the bottom, you will find the Timeline to compare the initial and final positions. Use the 1 and 2 keys as hotkeys to also view the initial and final positions.

In the top bar, find the following options in first section: Visibility of the upper and lower arches, front view, back view, side views, upper and lower occlusal views, and finally, chin-up view.

On the right side of the top bar, you will find:
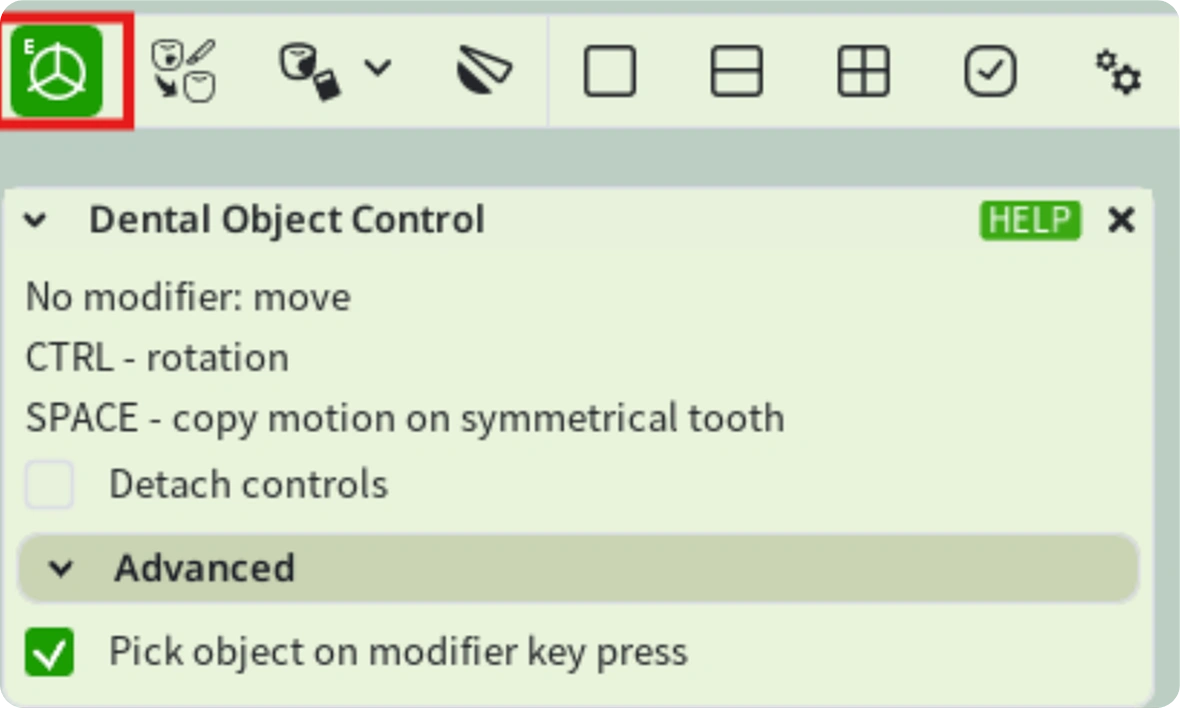
- Dental Object Control: Activates the axes for performing rotation, translation, angulation, and tipping movements. Hold the CTRL key to activate the rotation axes. Press the Spacebar to copy the movement to the corresponding tooth. By enabling the Detach Controls checkbox, you can modify the position of the axis. In Advanced, enable the Pick Object checkbox to select the tooth under the mouse cursor.