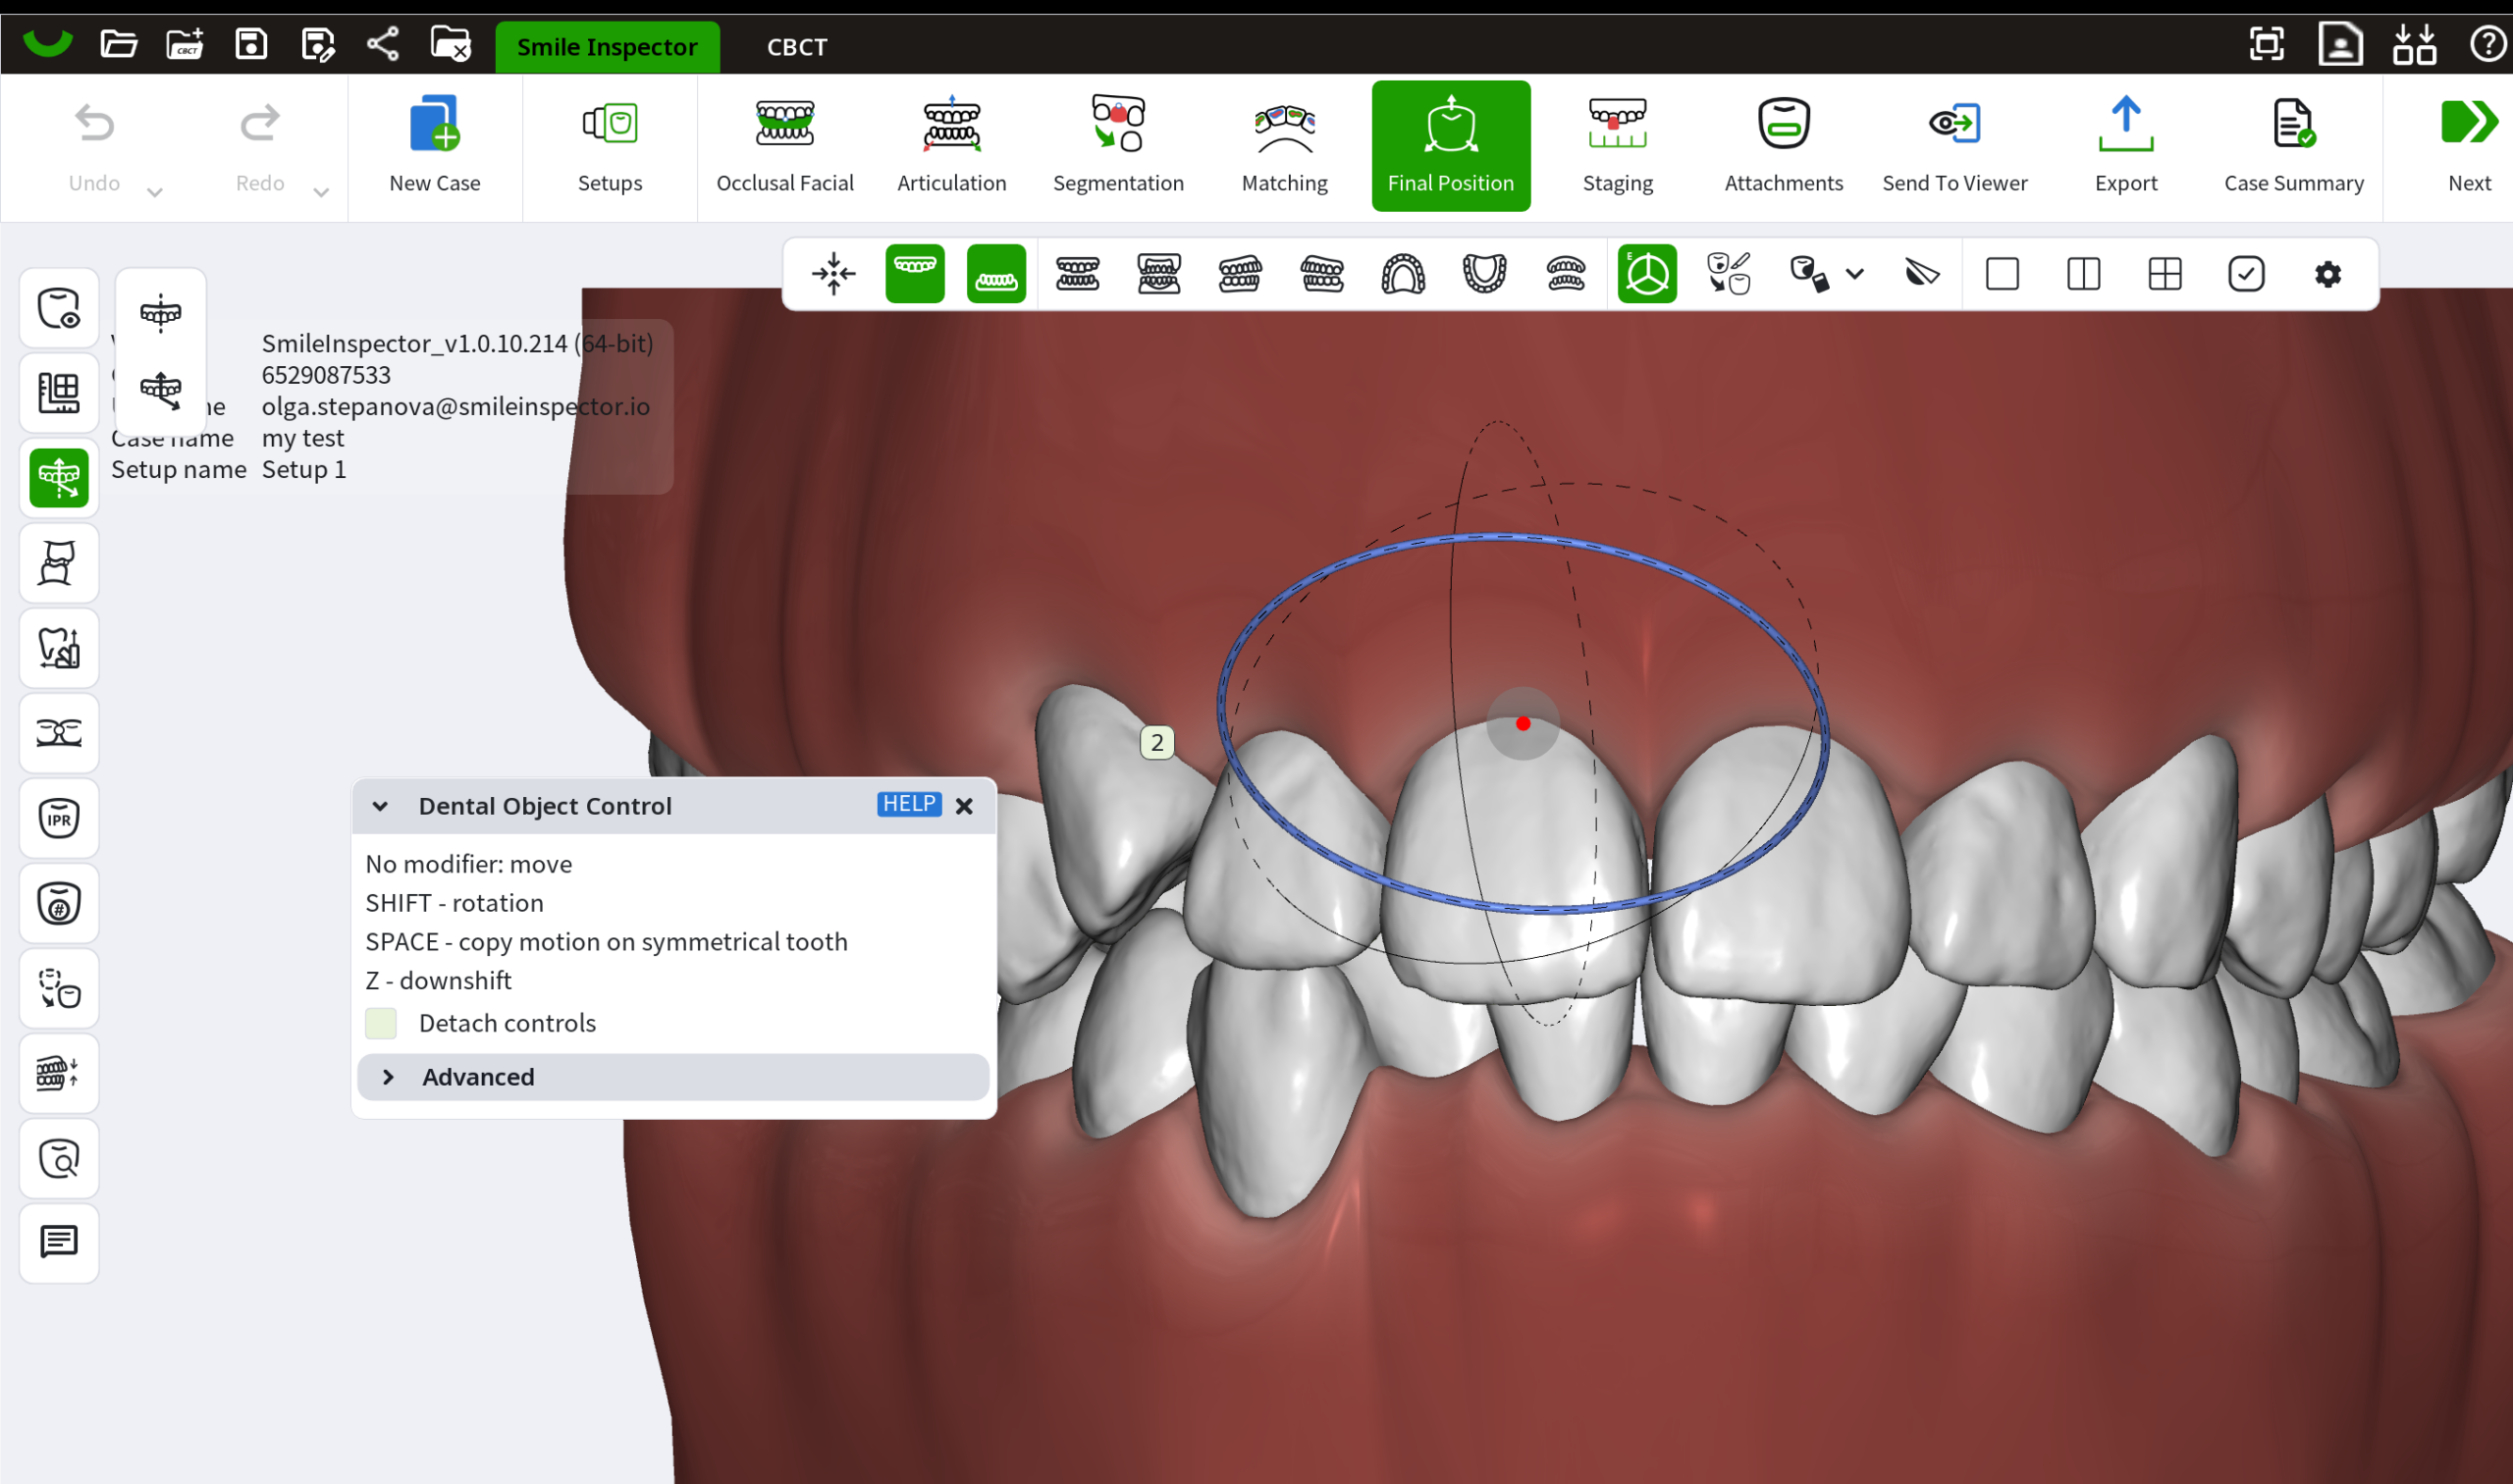
The Dental Object Control tool is used to move, rotate, and scale objects during treatment setup.
It is available in multiple stages of SmileInspector and works for teeth, jaws, bases, and attachments.
The tool can be used in:
- Articulation — to move the jaw position
- Matching — to move or rotate bases
- Final position — to move or rotate teeth
- Staging — to adjust tooth position at any stage
- Attachments mode — to move, rotate, or scale attachments
Selecting an object
Click on the object (tooth, jaw, base, or attachment).
Control axes will appear around the selected object.
By default, you can move the object by dragging the colored axis.
Movement directions correspond to:
- Occlusal / Gingival
- Mesial / Distal
- Buccal / Lingual
Rotation
Hold SHIFT to enable rotation.
Rotation axes will appear.
You can rotate the selected object to change:
- Rotation
- Inclination
- Angulation
Scaling
Hold Option (Alt) to enable uniform scale.
Scaling can be used for:
- Attachments
- Auxiliaries
- Other non-tooth objects
Copy motion to symmetrical tooth
Hold SPACE while moving or rotating a tooth.
The same motion will be applied to the symmetrical tooth.
Downshift
Hold Z to enable downshift mode.
This allows more precise adjustments of the selected object.
Detach Controls
Enable Detach Controls to move the control center.
This allows changing the pivot point used for rotation.
This can be used when precise rotation around a custom axis is required.